Bed Leveller (3D Printer Assistant)
Posted
#1
(In Topic #774)
Regular
In order to achieve proper adhesion and quality prints, it is of upmost importance that a 3D printer's bed is actually trammed to it's print head. When this is done properly, the printer will know how high the print head is above the print bed no matter where over the bed the head is told to go. This distance can vary depending on Z-stop location, bed temperature, bed warping, Z backlash, crashes, and changing build surfaces to name a few. Thus its required to check the machine's tram fairly often. When ever I start to get adhesion issues, this is the first thing I check.
To properly check the tram, it is required to simulate printing environment as much as possible. This means we need the bed to be heated to proper print temperature, and to have the machine move the head itself. Depending on the MDI/Jog controls on the printer, this may be difficult to do. This is where Bed Leveller comes in. It is designed to control the printer and move to pre defined locations in order to assist in the tramming process.
Bed Leveller v 1.0.0
/edit: Updated attachment to v2.0.4

Posted
Regular
You will also notice I used Sqlite to store and recall settings. I first started using it as I didn't want to manually write to and from text files. But after reading through our 'Did You Know' thread, I've since learned of the Settings function. I'm debating on rewriting all of my setting storage/retrieval functions to utilize it. I'm sure it would cut the code down significantly.
Posted

Regular
That's good for starters Mike!PartierSP said
This project is designed assist the user with manually tramming (levelling) their 3D printer's bed with it's print head…
After scanning the code over breakfast this morning, then checking that it looked 'safe', I hooked up my printer and stepped through the code.
As you have already noted in another thread, you are using "==" where you only need "=". You have also used:-
…in places, and simply:-
…in other places.
If you wanted to be consistent (but its really not important) you could stick to the second format, and then stuff like this:-
…could be replaced with:-
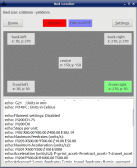
I need to take a second look, but the main form seems to be a fixed size, so on my system looks like this:-
(Click to enlarge)
As you are displaying the data returned by the printer, I need to be able to see all of it, either directly or by scanning through it.
I'd also recommend you use the ToolTip property where necessary. For example, for the "Rapid Plain" label:-
Code (gambas)
- Label11.Tooltip = "What the hell is this?"
You have written:-
Code (gambas)
Code (gambas)
You don't have a hot-end on/off at the moment, but I assume you are going to add this.
Thanks for this code, I love it.
Posted
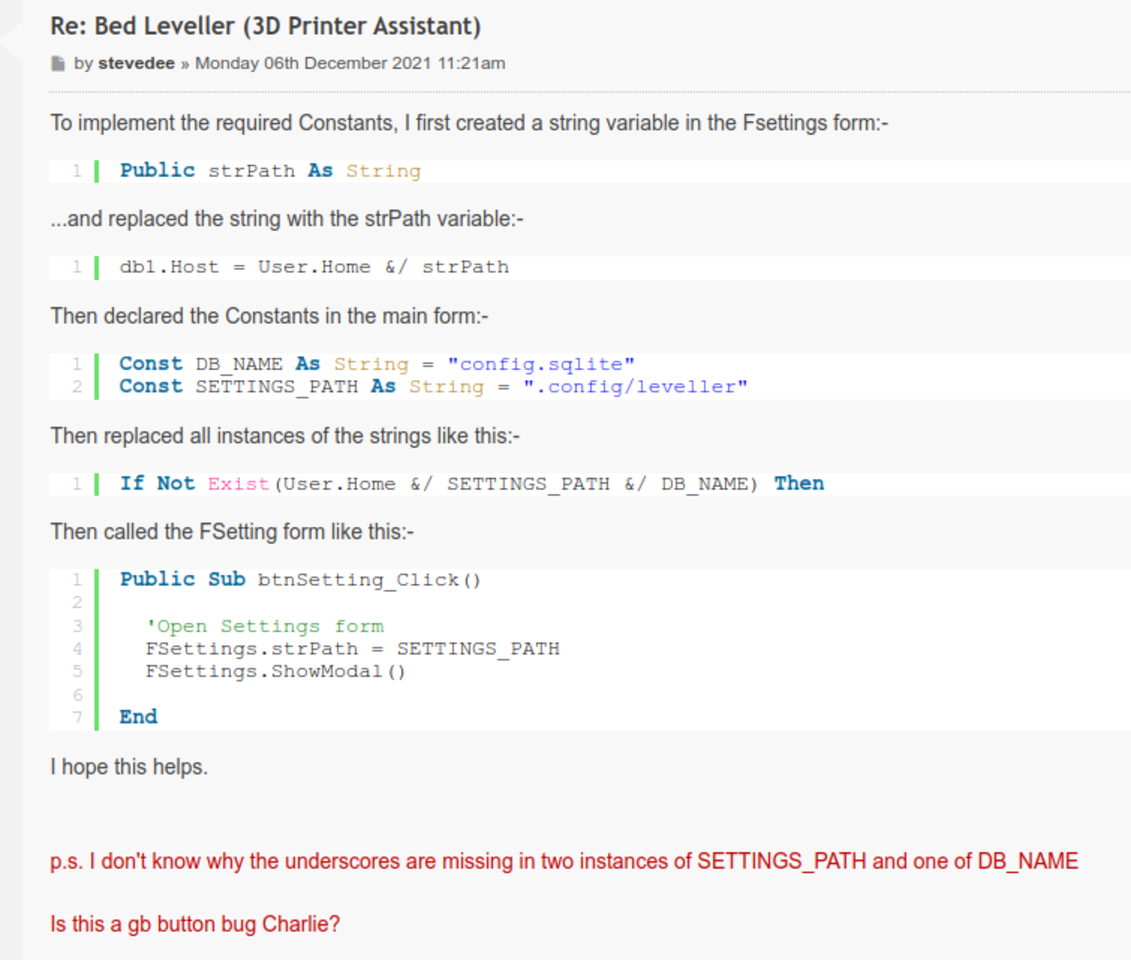
Regular
…and replaced the string with the strPath variable:-
Code (gambas)
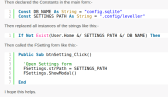
Then declared the Constants in the main form:-
Then replaced all instances of the strings like this:-
Then called the FSetting form like this:-
I hope this helps.
.
<COLOR color="#BF0000">p.s. I don't know why the underscores are missing in two instances of SETTINGS_PATH and one of DB_NAME
Is this a gb button bug Charlie?</COLOR>
Posted
Regular
(Click to enlarge)
Posted

Guru
I had to tinker as well. All I have done is make the Form resizeable.
stevedee
I don't see what's wrong?
<IMG src="https://www.cogier.com/gambas/gb_button1.png">
 </IMG>
Posted
Regular
cogier said
…I don't see what's wrong?
OK Charlie, its just me then;
(Click to enlarge)
Posted
Regular

I'll have to look at them when I get home.
Yes the main form was not resizable. I didn't want the window to be made too small where the buttons didn't have ample space between them. But if I was to force minimum width/height then this shouldn't be a problem.
I initially didn't want the hot end to heat up as 200C is a tad more painful to touch then say 70C. But if we look at turning this into more of a general purpose jog mode system/macro mode application, then yes hot end and even extruder control would be very useful.
I'm going to think on the 'danger' side of tramming with the hot end on today. It may not be that bad. As this would improve Z height accuracy some but shouldn't affect the actual tram (the hot end would have expanded the same amount no matter where it is above the bed, unlike the bed which may warp in unexpected ways).
Posted
Regular
PartierSP said
…I'm going to think on the 'danger' side of tramming with the hot end on today. It may not be that bad. As this would improve Z height accuracy some but shouldn't affect the actual tram (the hot end would have expanded the same amount no matter where it is above the bed, unlike the bed which may warp in unexpected ways).
I'm not sure what concerns you about leveling the bed with the hot-end/nozzle at its working temperature. On my CR10V3, its impossible to touch the nozzle during leveling because there is just a tiny gap between the extruder body and the bed (maybe this is not the case for all extruders).
It took me a while to realise that there was often a tiny bead of plastic on the tip of the nozzle (barely visible) which can throw out your leveling if the nozzle is cold. See my post for a better explanation: Captain Bodgit: My new favourite 3D printer bed leveling method
Re: bed warping; if the bed is not substantially flat, the only option is to 'map' the surface and to correct the g-code Z values to compensate. I guess this could be done manually, but the best approach is with something like a BLTouch sensor mounted on the extruder. (I've got one, still in its box, but never had the courage to update the printer software and install it...too many horror stories on the forum!).
Posted
Regular
cogier said
…I had to tinker as well. All I have done is make the Form resizeable…
Charlie, you are the king of resizable layouts!
As Mike said, what we now need are end-stops for minimum width and minimum height.
Min width looks easy; just make sure the form cannot be made smaller than the width of 3 buttons + x%.
For min height, maybe just use a simple measure like (say) the height of 6 buttons.
Posted
Regular

Like you said, when the hot end is down near the bed this isn't an issue for most printers. But if someone set the rapid plane up a couple of cm, they could get their fingers stuck in between the hot end and the bed. Now is this ever going to happen? Shouldn't any owner of a 3D printer realize the risks of a moving printer running at temperature? You would think they should, and hence respect the machine. Thus I was probably just over thinking this. The gains in having the hot end on really does out weighs this issue.
When I originally trammed my bed I only checked the corners. I later decided to check the centre as well and found it was actually warped upwards a bit (probably less then 0.10mm). But since Cura likes to put everything in the centre, I would set all four corners down slightly to get the centre of the bed at the correct height.
Posted
Regular
Posted
Regular
stevedee said
It took me a while to realise that there was often a tiny bead of plastic on the tip of the nozzle (barely visible) which can throw out your leveling if the nozzle is cold. See my post for a better explanation: Captain Bodgit: My new favourite 3D printer bed leveling method
Interesting read. Me being new to owning/running one of these printers, there is always something new to discover/learn. Yes we definitely need to add more functionality to this program. Get the hot end going, and even move to a predefined 'Cleaning' position. But I think after cleaning we may want to force another homing cycle in case the head has been bumped too hard. Thoughts?
Posted
Regular
Like you, product safety occupied a large chuck of my working life, especially during the 1980s & 90s with the introduction of the European Safety Directive.PartierSP said
I guess that's just the 'Engineer' in me concerned with that. My old job we'd have to brain storm all the safety issues of anything we were designing…
…Shouldn't any owner of a 3D printer realize the risks of a moving printer running at temperature?..
My 3D printer is certainly a hazardous piece of kit. Not only can the nozzle reach temperatures well over 250'C, but there are several crush hazards, finger traps and other pinch points around the partially unguarded toothed belts. So I doubt that it complies with EU safety standards.
Although Cura initially places models/prints at the centre of the platform, I always drag them to the corner nearest Home and then slice the model before printing.…But since Cura likes to put everything in the centre…
Posted
Regular
PartierSP said
…Get the hot end going, and even move to a predefined 'Cleaning' position. But I think after cleaning we may want to force another homing cycle in case the head has been bumped too hard. Thoughts?
I guess the first question is 'what is this program for? Is it basically for your own use or do you see this as an App for 3D Printer users?
It would be possible to set out a procedure and program your app to do every step from heating the nozzle and retracting the filament, to stepping between 'calibration' points on the bed. Or you could just settle for the system to step between cal points with a heated bed & nozzle, stopping periodically to allow the user to make a bed adjustment.
Anyway, here is one idea for a procedure;
1. press start and machine 'Homes' while heating bed and nozzle.
2. Once machine reaches target temperatures, program automatically retracts filament by a few millimetres (i.e. not far enough for filament to fully eject from extruder) and extruder rises (z) enough for nozzle inspection/cleaning (maybe 150mm).
3. press something to continue, machine Homes, then moves to position #1
4. User adjusts bed.
5. press to continue to next position, or to exit.
6. repeat 4 & 5 until done.
Posted
Regular
cogier - Thanks for that upload. It gave me a really good step up on getting FMain to resize. I've since tweaked it further and like how it works now except for the delay when moving the middle button row (Home, HE On, Bed On, Settings). Not sure what I can do to fix that yet.
Well I'm going to make it useful for me, and would like it to be useful for yourself as well. At that point, I'm sure others would find it useful as well.stevedee said
I guess the first question is 'what is this program for? Is it basically for your own use or do you see this as an App for 3D Printer users?
Instead of doing a full program of moves, waits, repeats, etc, I'm thinking of just enabling/disabling buttons as required. I like the extra flexibility this would give the operator. Especially when doing the actual tramming. The operator could jump from one position to any other position. And this would also allow them to recheck/clean the head at any time too. The only real issue I'd have to deal with would be Home first, and never move the extruder unless we are at full hot end temperature. Home first is easily dealt with by enabling/disabling buttons. Enforcing Hot End temperature would require sending a M109 S200 prior to an E command. I need to verify I got that M code correct. But it should set and pause the printer until the temperature is reached vs M104 which simply changes the temperature.It would be possible to set out a procedure and program your app to do every step from heating the nozzle and retracting the filament, to stepping between 'calibration' points on the bed. Or you could just settle for the system to step between cal points with a heated bed & nozzle, stopping periodically to allow the user to make a bed adjustment.
Anyway, here is one idea for a procedure;
1. press start and machine 'Homes' while heating bed and nozzle.
2. Once machine reaches target temperatures, program automatically retracts filament by a few millimetres (i.e. not far enough for filament to fully eject from extruder) and extruder rises (z) enough for nozzle inspection/cleaning (maybe 150mm).
3. press something to continue, machine Homes, then moves to position #1
4. User adjusts bed.
5. press to continue to next position, or to exit.
6. repeat 4 & 5 until done.
Anyway, here is the current beta I have.

Current Beta
Posted
Guru
cogier - Thanks for that upload. It gave me a really good step up on getting FMain to resize. I've since tweaked it further and like how it works now except for the delay when moving the middle button row (Home, HE On, Bed On, Settings). Not sure what I can do to fix that yet.
In my experience, a Splitter only wants 2 'top level' items to deal with. So I have put the 'Buttons' and the bottom panel in another VBox container so that the Splitter only has to deal with the 2. You need to use AutoResize OR Expand but not both. You can set the position of the split in Splitter with the Layout command, see line 37. vsMain.Layout = [40, 60] = 40% for the top and 60% for the bottom. You can set up a setting to save this array value if you want.
Posted
Regular
I started hacking something together yesterday afternoon, based upon my suggested procedure.PartierSP said
…Instead of doing a full program of moves, waits, repeats, etc, I'm thinking of just enabling/disabling buttons as required. I like the extra flexibility this would give the operator. Especially when doing the actual tramming. The operator could jump from one position to any other position. And this would also allow them to recheck/clean the head at any time too. The only real issue I'd have to deal with would be Home first, and never move the extruder unless we are at full hot end temperature. Home first is easily dealt with by enabling/disabling buttons. Enforcing Hot End temperature would require sending a M109 S200 prior to an E command. I need to verify I got that M code correct. But it should set and pause the printer until the temperature is reached vs M104 which simply changes the temperature…
I'm using "M104 S180" and "M140 S60" to set the temperatures, and "M155 S5" to instruct printer to return the temps every 5 seconds. I then get the program to proceed once the values are >= to the target values (180'C & 60'C).
Here are my Constants so far:-
Code (gambas)
I haven't done the filament retraction bit yet (…too many things competing for my time!).
Posted
Regular
With the kind of 3D printer that I have, there are four motors;
- one drives the printer head/extruder left and right (the X axis)
- the second one drives the heated bed or platform forwards & backwards (Y axis)
- the third one raises and lowers the print head (Z axis)
- and the forth one attempts to extrude the plastic filament into the heated print head/extruder (like a glue-gun) or retract it
With this configuration, when the printer is given the "home" command (g-code G28) it operates the X,Y & Z motors to their minimum position; i.e. the motors stop when each axis operates its dedicated limit switch. On my printer, these are just simple micro-switches.
All further movement (e.g. X, Y & Z coordinates defined by the object you are printing) is relative to this "home" position. The task of bed-leveling involves raising or lowering each corner of the bed until the bed almost touches the extruder nozzle. I try to set this nozzle-to-bed gap to 75um (0.075mm). Therefore if I then print an object where the required layer thickness is (say) 0.2mm, the first layer is printed with the nozzle about 0.275mm above the bed.
So you can see that we are operating with a very demanding setup. And the expansion/contraction of parts due to temperature should, where possible, be minimised.
Its quite remarkable that the damn thing works!
Posted
Regular
stevedee said
I try to set this nozzle-to-bed gap to 75um (0.075mm). Therefore if I then print an object where the required layer thickness is (say) 0.2mm, the first layer is printed with the nozzle about 0.275mm above the bed.
I was doing much the same except using a single sheet of printer paper as my shim instead. But I was finding it was too thick and I tried switching to some thinner paper (what a pain to work with that was). It was then I found out I should have been telling the printer to position its self the paper thickness above the bed and then level it. And that's what started this project. So in reality any shim with a known thickness will work. For that matter, even a decent quality drill shank could possibly be used.
Posted
Regular
cogier said
In my experience, a Splitter only wants 2 'top level' items to deal with. So I have put the 'Buttons' and the bottom panel in another VBox container so that the Splitter only has to deal with the 2. You need to use AutoResize OR Expand but not both. You can set the position of the split in Splitter with the Layout command, see line 37. vsMain.Layout = [40, 60] = 40% for the top and 60% for the bottom. You can set up a setting to save this array value if you want.
Bed-Leveller-beta-1.3.tar.gz
Ah, that worked out nicely. I guess I got to do some more research into the use of AutoResize and Expand. I got to figure out when to use each.
Posted
Regular
PartierSP said
…It was then I found out I should have been telling the printer to position its self the paper thickness above the bed and then level it. And that's what started this project. So in reality any shim with a known thickness will work. For that matter, even a decent quality drill shank could possibly be used.
So I may indeed be getting it wrong. Are you saying that after you have finished leveling, when you 'home' the printer, the nozzle just touches the bed?
Posted
Regular
So essentially your first pass wont have enough plastic resulting the expected pressure against the bed and/or each pass on the first layer will be spaced out too much not getting enough pressure against each other. Now the shim you're using is a very thin one so I don't expect you'll notice too much. Its just you're not at the 'theoretically perfect'. And if you use glue on your bed you may be easily making up for this extra gap and some. But one thing I've learned with automated equipment, if it works for you, then it works for you.
I have heard of people getting so called 'elephant's foot' error on their prints. This is where the first layer (or first few layers) bulge out at the bed. I'm not sure if this is a sign of the nozzle being set too low on the first pass, or a temperature issue, or what. But its something to look out for if you try new techniques.
Posted
Regular
Posted
Regular
<LIST>
- <LI>
- I nearly have my clean function ready to enable. My printer has been busy all day so I haven't had a chance to prove out that code yet. So I've kept that section REM'd out for now.</LI>
<LI> - I've forced a minimal size for fMain. It grows automatically if set too small. </LI>
<LI> - The fSettings is now rearranged to include tabbed sections.</LI>
<LI> - If fSettings is sized too small, scroll bars appear as required within each tab. But not quit right yet, see below.</LI>
<LI> - Numerous small tweaks here and there.</LI>
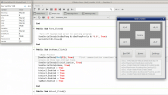
So the problem I've been having with the fSettings form are the text boxes and spin boxes combined with the scroll bars. When any of these items scroll off of the tab, they appear over everything else on the form (see attached pics). :cry:
I was thinking it was a layering issue and tried the 'Send to Background' and 'Bring to Forground' buttons on the various controls but to no avail. Then I realized the Combo boxes and Text boxes were working as expected. So now I'm left wondering if this is a Gambas bug? Some sort of bug with my window manager? Or is there a setting I'm just missing. Any help would be much appreciated.
Scrolling issue example 1

(Click to enlarge)
1 guest and 0 members have just viewed this.